June 2018, Vol. 245, No. 6
Features
MFL Data Contributes to Integrity Management of Difficult-to-Pig Pipelines
By Peter van Beugen, Managing Director, Pipesurvey International, and Marleen Gebraad and Julie Melling, Pipeline Integrity Engineer
Interpretation and analysis of magnetic flux leakage (MFL) data has achieved advanced level of accuracy and time efficiency in the realm of difficult to pig pipelines and offers a reliable resource in the management of pipeline integrity.
MFL tools have obtained a significant track record for the determination of the integrity of pipelines. The technology offers a solution for an otherwise almost insoluble problem. How do we address the integrity of large underground infrastructures other than by conducting extensive ground movement or taking the line out of operation?
MFL tools apply advanced sensor technology in harsh environments and companies have developed powerful software to analyze large amounts of inspection data and report features that pose a hazard or threat to the pipeline and its environment.
The technology is now extended to pipelines that pose a challenge for a regular pigging operation. This challenge may originate from various perspectives including construction and the lack of available facilities that do not offer the conditions to conduct a pigging operation or operational issues where pressure and flow are too low to achieve conditions to run a conventional ILI tool.
At the same time, there is a demand from the industry to the obtain statements quickly and accurately about events that interfere with pipeline integrity other than the standard corrosion features. These include combined defects, illegal tapping, defects in weld area and small-sized features in seamless pipe.
The MFL tool, although it has limitations of its own, is still considered the most wide spread technology for pipeline inspections. It is applicable in oil and gas pipelines and is more forgiving to pipeline contaminations than ultrasonic testing (UT).
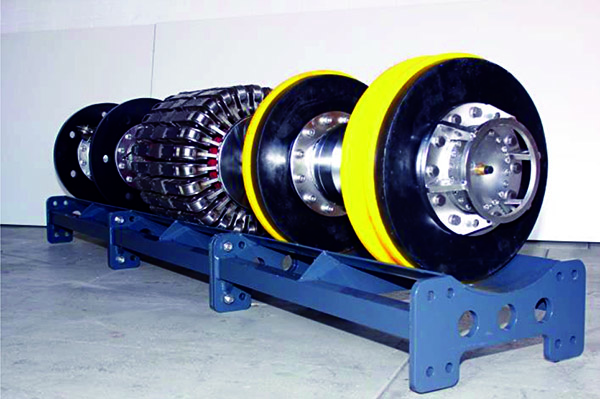
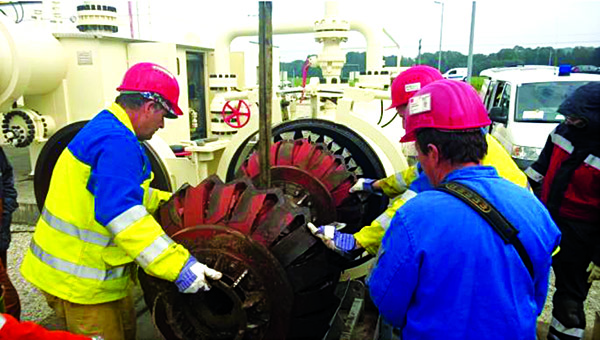
It also will pick up signals from even the smallest abnormalities, including pinholes. The MFL tools are autonomous with onboard data storage, sensor technology and batteries. The Pipesurvey International ILI tool is less sensitive to contamination since it has no brushes that could pick up magnetized dust from the pipeline. This reduces the risk of high friction and stuck pigs at heavy wall sections or weld penetrations. The magnetizing system generates an even and strong field that helps discern small defects, even in the direct vicinity of larger pipeline defects. The tool is wheel-suspended, which reduces pipeline friction and offers the possibility to inspect gas pipelines at pressures less than 20 bar. (Figures 1 & 2).
The measuring module gives full wall coverage and has the ability to collapse in smaller diameters which offers the possibility to inspect multi-diameter pipelines. The tool is bidirectional design and will pass through short-radius 1.5D bends so it will be used not only in long distance transmission pipelines, but also in short lines like jetties, tank farms and offshore.
Of equal importance to the hardware is the software and algorithms that support the analysis and reporting of the defects.
The first field application discussed is the detection of small defects in seamless pipe with a very heavy noise pattern. Due to the manufacturing process, seamless pipe shows higher variations in the background signal than welded pipe. Much depends on the quality of pipe for the level of variation.
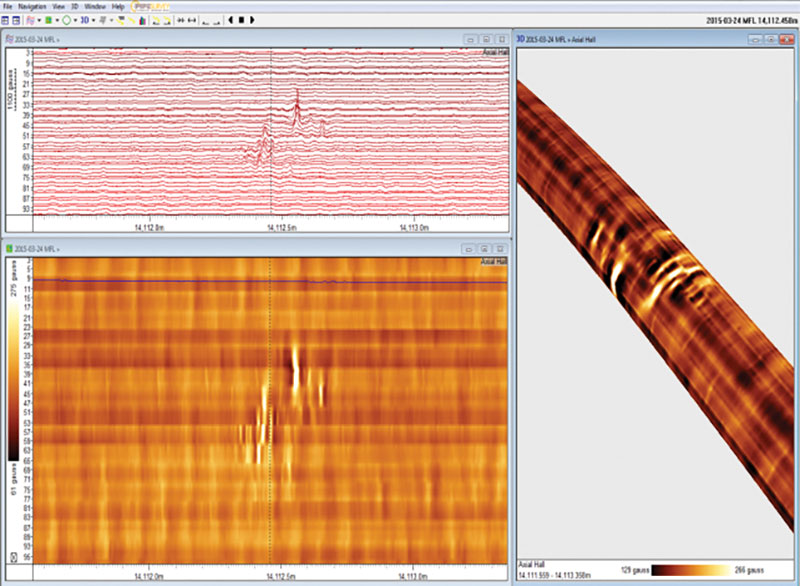
In modern pipes the pattern will be somewhat regular and be limited to approximately 12.5% of the signal. But in older pipelines, the signal will be highly irregular and may reach levels up to 20% of the background signal, if not higher. This means that signal filters have limited capability of reducing the noise level and over-filtering may cancel-out the signal of small crevice-like defects that have a depth well over 20-25%. Pipesurvey has developed programs for signal processing to address this issue. The case history shows a defect with length of 6.7 mm, a breadth of 25.5 mm and a depth of 62% in a heavy noise seamless pipe. The defect was exposed and verified by field measurements.
The UT field verification reported a peak depth of 50 - 61%, a breadth of 25 mm and a length of 13 mm. Part is this length however was below the threshold of 15% for seamless pipe. Considering the conditions of this pipe, the result is stunning and gives an unsurpassed confidence level for difficult-to-inspect pipelines. (Figure 5)
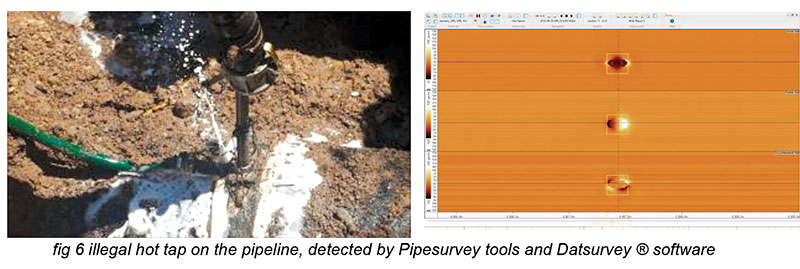
An issue raising concern to pipeline companies in many countries is the issue of illegal hot taps. Third parties approach buried pipes and use professional or amateur equipment to connect to the pipeline and divert product from the pipeline for black market. The activity is a major economic and safety concern.
On a yearly basis, the product loss may accumulate to millions of dollars and the interference with the pipeline may result in damage to the environment and even the loss of lives. The third parties have sometimes sophisticated their technique so as to create very low and small signal in the pipeline in order to hide the activity from the company or from the inspection company.
Once the features have been detected however, it is important that they be reported in order to take mitigating measures (Figure 6).
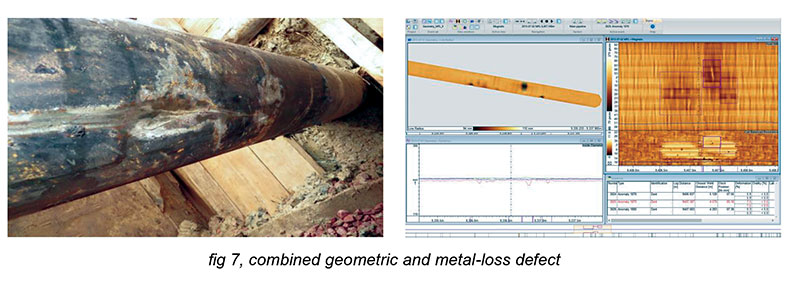
Small pinhole features near welded areas are another concern. Small pinholes give a weak signal and may easily lead to underestimation of the defect depth. Features in or near welds are difficult to size. The sensors will move and may experience lift-off from the pipe-wall.
These phenomena will in itself create signals in presence of the magnetic field, which is otherwise variable due to wall thickness variations. The same will happen at complex features, like dents associated with metal loss and gouges. In these instances the accuracy of the measurement may be reduced to only 20% of the nominal wall thickness (Figure 7).
The case history shows a combined geometric deformation of the pipeline and a metal loss defect. The deformation was reported with a dent depth of 7.5% and an ovality of 5%. The field verification measured a dent depth of 7.1% and an ovality of 5%. In spite of the sensor movement and lift off, the reported metal loss was well within 20% of the specified accuracy.
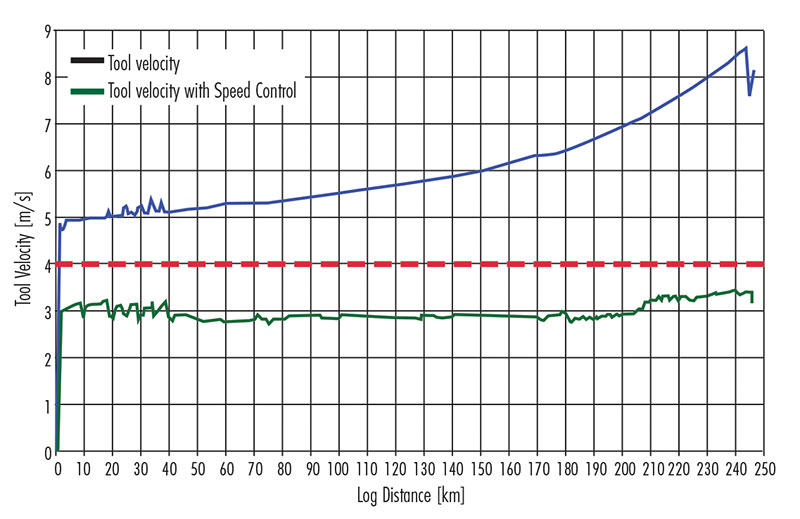
The technology applies to pipelines operating at velocities well above 4 m/s as well as to pipelines operating at velocities lower than 1 m/s. At the same time, pipelines in tank farms without launcher or receiver can be inspected using the bidirectional functionality of the Pipesurvey International tool. P&GJ
Author: Peter van Beugen is the managing director of Pipesurvey International and has 20 years’ experience in pipelines. He has a bachelor’s degree in mechanical engineering from the Rotterdam University of Technology and his master’s degree in physics from the University of Applied Sciences in Delft.





Comments