August 2009 Vol. 236 No. 8
TechNotes
Affordable Automated Orifice Meter Tube Honing Process Now Available

A new meter tube honing technology that uses existing tools while increasing worker safety and accuracy of results is available.
ID finishing of orifice meter tubes is one of those important jobs that falls through the cracks of being low-tech enough that it is often still tackled with a die grinder and some form of manual, homemade hone. It is a somewhat dangerous, trial-and-error process to handle manually, but affordable new honing technology is available to produce a superior part in less time, without manual labor.
What is honing? Honing is an abrasive machining process where a tool with expanding abrasive stone assemblies rotates in a bore, while the tool or the part reciprocates rapidly during the process. Honing produces the final ID size, geometry (roundness, straightness, etc.) and specified surface finish.
Meter tubes, also called “meter runs,” are critical parts of the orifice meter because the honed surface finish influences accuracy. More than a million orifice meters are used in the U.S., often at custody transfer points to determine billing amounts. Thus, there is an expectation for high accuracy, and the honed meter tube plays a critical role.
Accuracy of the orifice meter requires a laminar gas flow, which the meter tube finish helps produce. The meter tube allows swirl or turbulence in the gas stream to smooth out, producing a laminar flow before and after the orifice plate. A flow conditioner is often used inside the meter run upstream from the orifice to help create a laminar flow within a shorter length of meter tube. The maximum and minimum surface roughness on meter run IDs are functions of the beta ratio and nominal diameter of the tube, but typically fall in a range of 100-300 µin Ra. It seems contradictory, but an excessively smooth surface causes turbulence in the gas stream.
AGA and API spell out detailed specifications for meter assemblies and components, and manufacturers may use meter-quality tubing or standard pipe for meter runs, as long as the end product meets specification. The meter run itself is actually a fabrication with welded flanges or fittings on both ends, so manufacturers must eliminate evidence of the weld bead and restore a correct ID surface finish. This is a multi-step process. The pipe may first be chucked into a lathe to machine out most of the weld bead, but most of the time its ground down with a die grinder using an aluminum oxide “rock” or carbide burr on a long rod. The final step is honing, often with a manually stroked, homemade hone of some kind.
The manual homemade hone usually consists of a drill motor with a shaft several meters long that mounts standard honing tools. The lack of power stroking, a clutch system, automatic tool feed or load meter/control makes this a physically demanding job (for manually stroking the part) that requires good tactile sense to find tight spots in the bore, as well as to avoid binding the tool in the pipe – a condition that industry wags find darkly humorous.
Manual hones have dominated in this application because the job simply does not demand the power, precision and higher cost of an industrial tube hone, but that has changed with the introduction of low-cost, automated tube hones that can use legacy tooling.
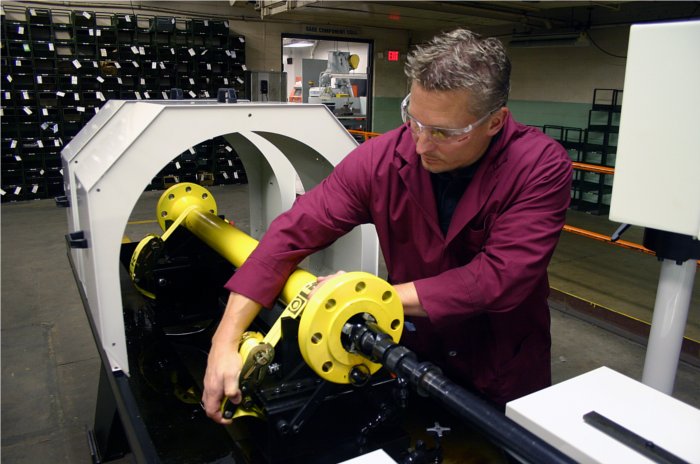
The budget-priced HTA tube hone is the first in this new class – an all-electric, lean design, engineered specifically for lighter-duty applications where initial machine cost is most important. Able to mount ANR275-type tooling, the most widely used tools on manual hones, it is aimed at “surfacing” applications, where stock removal is in the range of 0.030 inches (0.76 mm). The base price of the machine is less than $50,000 for a model with a 12-foot (4 m) stroke, and it is ideal for meter runs because it is automatically stroked, safer (clutched), more accurate, and pays for itself quickly in reduced cycle times, operator fatigue and workman’s comp claims. It includes high-end features, such as Siemens drives and PLC-control with touch-screen HMI for setting all machine parameters, including stroke reversal point, spindle/stroking speeds, and crosshatch angle calculation – try that with a homemade machine.
The control features a load meter to determine areas of bore tightness, so the operator does not have to go by “feel.” It is easy to then dwell the tool in tight spots using a joy stick. Other advanced capabilities include automatic tool tensioning, set through the PLC. The tool-feed system can be programmed to expand the honing tool to a pre-determined spindle load that is adjustable for any application, protecting the machine, tooling and workers, and allowing inexperienced operators to produce consistent results.
The machine is available for 6-foot (2 m) and 12-foot (4 m) part lengths, with bore IDs of 2.5 to 21 inches (63.5 – 533 mm) and maximum part OD of 24 inches (610 mm), and part weights to 4,000 pounds (1,818 kg). An electronically controlled, 3-hp (2.24 kW), AC gear motor powers the spindle at 0-300 rpm, while the servo-driven stroking system has a speed range of 0 90 ft/min (27.4 m/min).
Initial grinding on the weld bead is often still needed before honing, but the speed, consistency and safety of meter tube production are greatly enhanced with the new low-cost, automated honing solution.
Author
Dennis Westhoff is a 13-year veteran of Sunnen Products Co. and serves as Global Business Development Manager. He holds a bachelor’s degree in mechanical engineering and has extensive experience in special systems engineering, tooling design and abrasives.


Comments