October 2016, Vol. 243, No. 10
Features
Safest Way to Perform Integrity Assessments

Pipeline operators and integrity engineers are facing increasing pressure from regulatory authorities and environmental groups to guarantee pipeline network integrity. This is why it is so important to understand the condition of their assets and perform the necessary inspections to correct potentially unsafe and critical conditions that could cause a catastrophe.
When looking at the literature, it seems the first pipeline ever built was a few thousand years ago in China. At the time, they used bamboo with mud seals to move water. However, pipelines as we know them today were introduced in 1806 by the London and Westminster Gas Light and Coke Company. From that moment, pipelines companies expanded fairly quickly with increasing demand for oil and natural gas.
Following the growth of pipeline companies, construction maintenance techniques evolved. Today, optical-based 3-D scanners are the most advanced tools a pipeline operator and integrity engineers can refer to for integrity assessment.
General Definition
3-D scanners are still considered new tools in pipeline integrity assessment. They are extremely effective solutions compared to conservative calculation methods. In fact, the amount of information gathered by a 3-D scanner makes it suitable for sophisticated assessments, providing local depth readings with more precision to indicate whether a pipe segment is fit for service.
3-D scanners are tri-dimensional measurement devices used to capture real-world objects and environments so they can be remodeled and analyzed in the digital world. In this article, the term “3-D scanner” refers to the non-contact measurement process between the device and the physical part. 3-D scanners are, from a macro point of view, 2-D cameras from which a complete 3-D model of an object can be extracted using picture registration and triangulation.
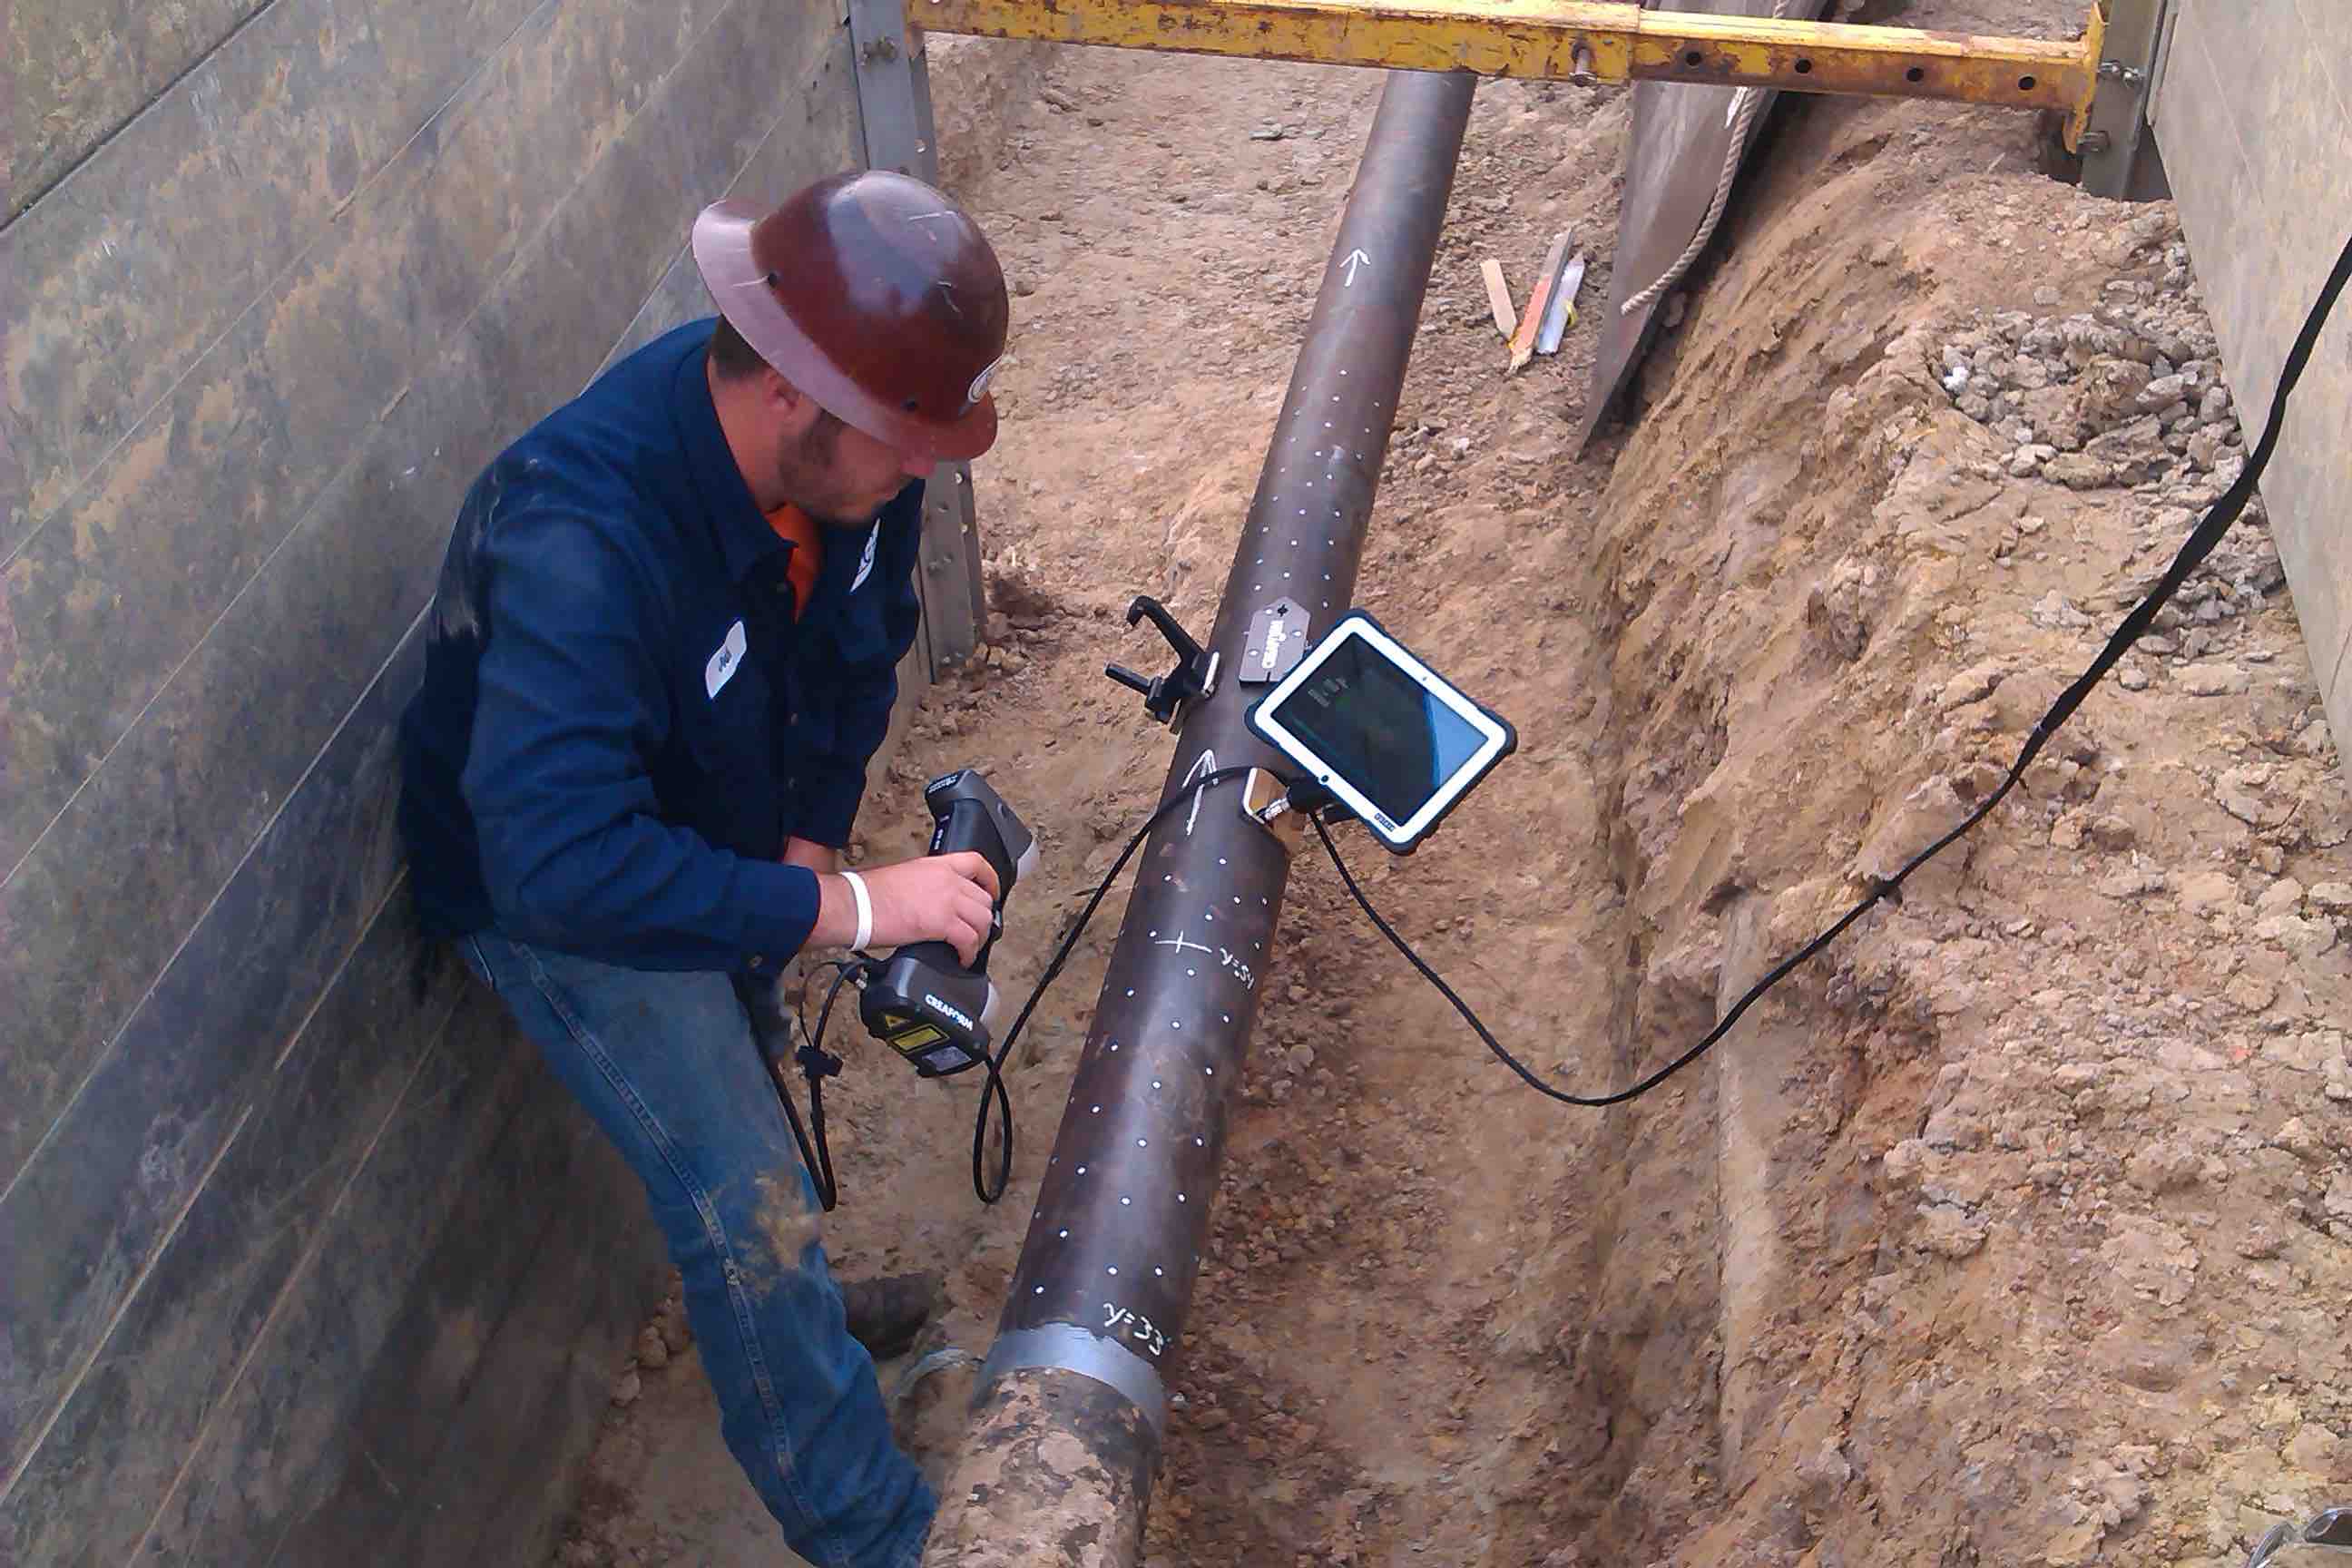
Handy SCAN 3-D scanner
How Does It Work?
Scanned surfaces can be used directly in procedures for assessments of pressurized components subject to local metal loss from corrosion, erosion or both. Surface information extracted from the scan data provides sufficient information to quantify a component for continued operations or rerating. Damage caused by pitting, mechanical issues or blend grinding that exceeds corrosion allowance also can be evaluated using 3-D scanners in conjunction with the same assessment procedure.
Metal-loss assessments can be based on different industry codes and standards. Traditionally, corrosion assessment techniques reside on thickness profiles. Pit gauges are generally used for this type of assessment.
A 3-D scanner that can gather significant amounts of points per second is the ideal tool to maximize result accuracy, field efficiency and conservative assessments. The ultimate goal is to determine the maximum allowable operating pressure (MAOP) or maximum fill height (MFH) for a tank.
Extracting the critical thickness profile is one of the most time-consuming operations during the assessment process, and such operations can directly be affected by a technician’s skills. When using 3-D scanners, users can capture the entire metal loss area and parent material surrounding the localized corrosion faster and more easily.
When combined with pipeline integrity assessment software, 3-D scanners can automatically identify critical thickness profiles and outline the minimum thickness found on the scan data. This is a tremendous timesaver for both data acquisition and integrity analysis.
Training-Free Software
To get the maximum benefits out of a 3-D scanner, it’s important to use the right tool to extract the information from the 3-D model. A new generation of software to accomplish this was initially developed in 2011. The software is application-specific and guides the user through the right process to perform code-compliant assessments.
Different than general 3-D software, this new kind of software is configured based on user requests. For example, parameters that need to be set will be different if a customer wants to perform material loss assessment instead of mechanical damage analyses.

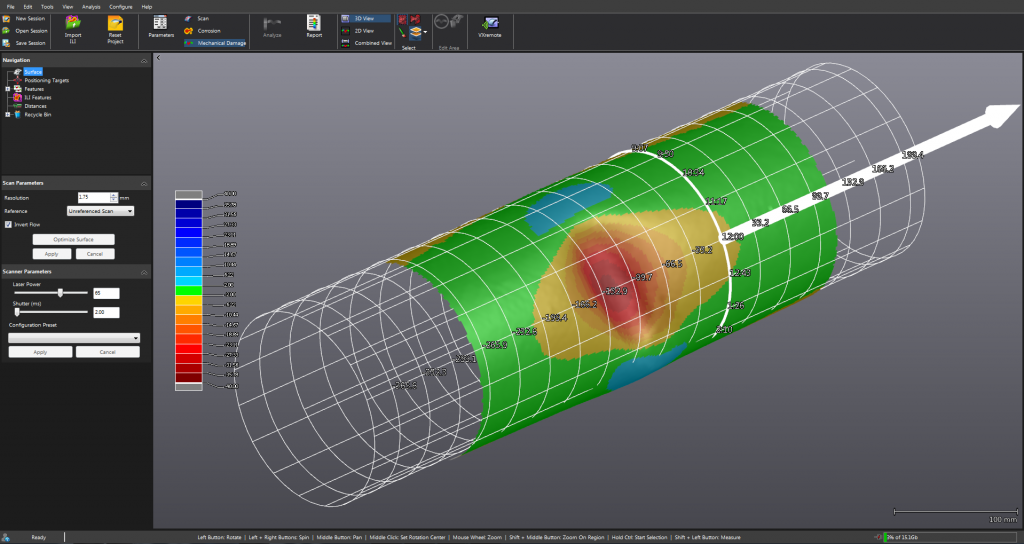
Pipeline integrity assessment software
By removing the complexity for high-density data handling and focusing on the application itself, recent integrity software gives direct access to advanced assessment techniques for better decision-making. A great example comes from the mechanical damage assessment: It has never been easier to perform strain-based assessment.
Inline Inspection Correlation
Although inline inspection (ILI) tools are a good way to detect potential problems before any serious consequences, they are not always appropriate for finding particular types of defects. There are millions of miles of pipeline in the world – improving sensitivity and reliability of these non-destructive tools is crucial for public safety.
To help understand the real performances of the tool, results extracted from 3-D scanners can be correlated to pig data. This correlation is usually performed by looking at a number only. With the right integrity software, it’s possible to display in 3-D that correlation prior to exporting unity chart.
During construction, when there are no obstacles, building a straight pipeline is usually the way to go. However, there can be crossroads, rivers, buried or aboveground structures that create the need for field bends.
As pipes have a certain amount of flexibility, they can be gently turned. Sometimes several successive bends are required to go around an object. When corrosion is found in a sharp bend, conventional pit gauge techniques cannot work. In these cases, assessments are generally based on the ultrasonic testing (UT) technique. Integrity software can take 3-D scanner data and straighten it, maintaining the benefits of speed and high-resolution data of the 3-D scanners.
Applicability, Limitations
Major causes of oil or gas spills can be listed in different categories. Generally 3-D scanners can help assess damage caused by corrosion (external and internal) and in cases of mechanical damages. That type of damage is usually the result of natural hazards, excavators or agricultural activities.
All assessment procedures developed to evaluate the pressure boundaries of pressure vessels, boiler components, piping and shell courses of storage tanks with a flaw resulting from single or multiple damages can benefit from 3-D scanners. These tools can help with the assessment of non-pressure-boundary components such as supports.
Even components not designed to original design criteria can be analyzed with a 3-D scanner to identify metal loss that can occur over a specific period of time. Several tools are available to compare scans of the same component at different times. Such procedures can be extremely useful for corrosion management.
The main limitation of all 3-D scanners comes from basic optical rules. These scanners can only digitize the exposed surfaces. This is true for laser-based 3-D scanners and structured-light technologies.
What is the Future?
What is for sure is that 3-D assessments won’t go away any time soon. We are at the beginning of a new era. Older, conventional methods will be slowly replaced by new technologies. Now it’s time for 3-D scanners to perform corrosion- and mechanical-damage assessments. Moreover, 3-D scanners will continue to evolve. The scanners that pipeline companies have begun using are not the ones they will use in five years.
Following this technological evolution, there will be a software revolution to support the need for simplicity. Application-oriented software will continue to improve, offering faster, better and more accurate results to pipeline integrity engineers.
An excellent example of this evolution has emerged with advanced non-destructive technology (NDT) integrity software, which combines multiple NDT technologies. Since every NDT technique has its own strengths and weaknesses, being able to merge measurement results from the best 3-D scanner in the world with the most sophisticated UT measurement techniques is a real game changer! Integrity engineers will benefit from the most accurate and actionable information available to make informed decisions and ensure public safety.
Many NDT manufacturing companies invest a great deal of money in research and development to innovate and solve UT challenges, such as external metal loss; however, concrete solutions are available to make safer decisions.
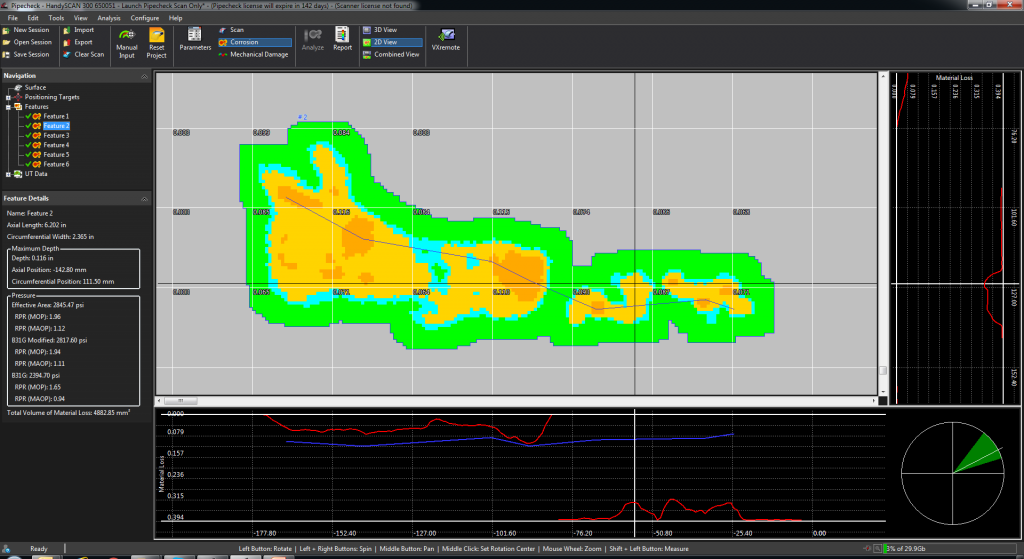
True wall thickness assessment
Conclusion
3-D scanners are used for pipeline fitness-for-service evaluations and replace conventional methods, such as pit gauges and ultrasound probes. Corrosion and mechanical damage assessments can now be characterized as having extremely high accuracy and repeatability.
The development of 3-D technologies in the market has definitely set a new standard for integrity work in the pipeline industry. These are great tools and provide the safest way for integrity engineers and pipeline companies to assess the health of their networks.
Author: Jérôme-Alexandre Lavoie joined Creaform in 2007 as an application engineer. After four years, he became product manager for development of non-destructive testing (NDT) solutions. Lavoie holds a physical engineering degree form Laval University in Quebec.


Comments